

.
One rule set that has been on Osprey’s release list for a while has been their Napoleonic skirmish system, Chosen Men. The rules don’t cost much and they promise an easy one stop system for quick pick up and play Napoleonic skirmishes…so how do they look.
The physical rulebook is your typical Osprey title though this one has a reduced font to get all info into the rules in the page format. There is nice YouTube video showing the actual rules and a flick through and it’s worthwhile checking it out to see what it is you actually get.
I won’t review the rules as such but rather comment on our experience playing a game and some thoughts about the game overall. To that end I put together a game for a period I had bought them for that was not the Napoleonic period they were written for. Cry foul, I here you say, but maybe not so much.
I have put together American Civil War lists for our use but in doing so I repurposed a number of existing troop profiles to account for the way I wish to represent the armies of blue and grey. This off course is subjective based on your own opinion of how troops in the civil war should be classed but the troop profiles I think give a fair representation of the troops in my list.
However, the troop profiles and points costings are the same as the original Napoleonic troops…so we should get similar results…we are essentially playtesting Napoleonic troop types. I have not messed with the troop profiles. Grab the lists here. I knocked up a playsheet as one is not yet available.
The unique rules I’ve added allow for some weapons variation, namely rifled muskets and breechloading carbines – the rules for these however are from the rulebook, so nothing new is added….they’ve just been repurposed. For example, I allow breechloader to Fire and Move and re roll their misses when they fire (ala the Opening Volley trait).
I use four grades for Civil War infantry and cavalry and three for artillery. Infantry and cav are rated Crack, Veteran, Trained and Green. Artillery are rated veteran, trained and green. Each army has a Colonel, Major and Spy profile, just like the Napoleonic lists given in the rules.
I’ve included some profiles for sharpshooters, militia, and guerrillas as well. All troops have the two rank shooter rule allowing both first and second ranks to fire on a Fire! Action. Yotu can download the civil war profiles that we used for our game to see the way I’ve rated them in the game in the links above.
.
.
The Battle of Granny’s Patch.
For our playtest we put together a 450pt game. We used the Western theatre as our setting somewhere in the backwoods of Kentucky. It also gave us an excuse to use our new fancy mat ‘Zulu War’ from Tinywargames. This would be a typical game in the system, on the higher points side. The forces used were as follows;
USA
1 Major with the Indefatigable trait.
1 unit of 8 Veteran cavalry with breechloading carbines.
1 unit of 10 local marauding guerrillas with hatchets and muskets
1 unit of 12 Union infantry with rifled musket
The Union special ability allows for them to choose their Cauldron of War stratagem…they chose off table artillery support.
.
CSA
1 Major with the King and Country trait
5 units of Trained Confederate infantry with rifled muskets
The Confederate special ability allows for them to us the Rebel Yell once per game.
The game.
.
Turn 1
Table layout as below. Fences provide light cover as does the wood and area of scrub. The buildings are treated as impassable.
The scenario played was Scenario 2; Take and Hold. There were three objectives in the central zone +/- 6″ of the table centre. Who ever controlled the most at game end wins. The three objectives were brown crates.
.

.
.
.
.

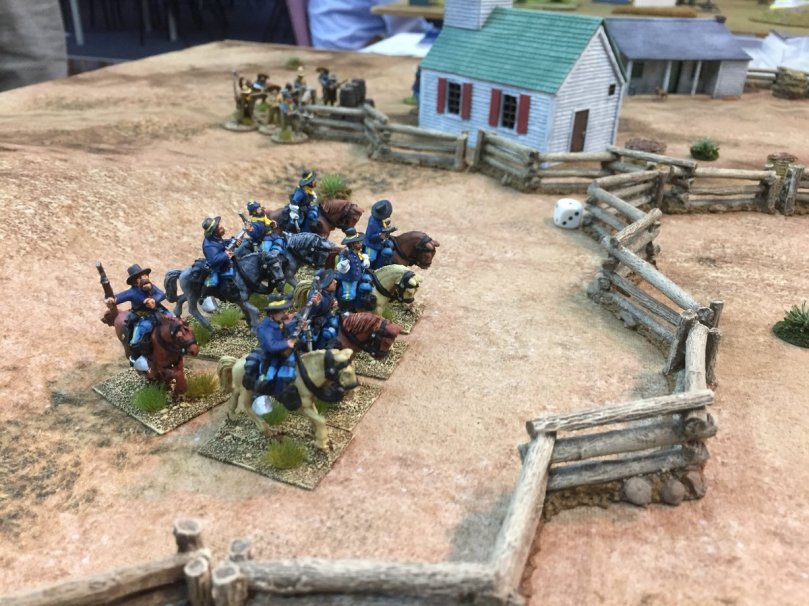
Initial deployment. The yanks had their cav ride over the crest of the hill whilst the infantry moved into the town after having used a stratagem to shift one unit after deployment…tricky. The guerrillas brought up the centre.
The Rebs had two units move toward the woods to seize the left flank objective. Two units brought up the centre and a single unit on the right flank to take up a position on the fenceline and defend the objective near their jump off positions. This worked well as their randomly determined Cauldron of War effect enabled a unit to advance forward before game start…this would help in this scenario.
.
.
.
.

…rebs movin’ out…
.
.
.
.

…the main line advances to contact…
.
.
.
.

Here you see the Yanks deployed before their regular unit (in blue) did its tricky redeployment into town.
.
.
.
.

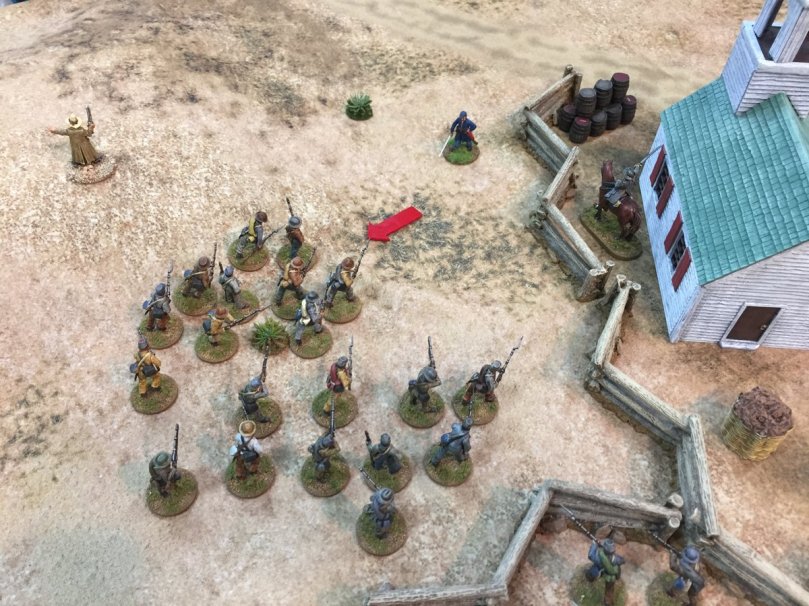
Rebs advance forward quickly with the Cauldron of War bonus move…‘to the fence boys!!’
.
.
.
.
Turn 2
The yanks have moved into town near the church whilst the guerrillas and cav push on. The Rebs make steady progress toward the defensible terrain to secure two of the three objectives.
This essentially meant that the scenario had now turned into an attack/defence as the first side to secure two objectives now only needed to defend.

.
.
.
.
…Yankee cavalry…
…for reasons unknown, their officer took them on a death ride that Von Bredow would emulate only a few years later…
.
.
.
.

“….we’ll form up on the fence and secure the supply crates boys…hurry!…at the double quick!!!…
The Rebs use a move at the double action costing them 2 of their 3 available action points. The best formation to be in is skirmish order to allow for rapid movement. Firing is virtually as effective as well.
.
.
.
.

“…steady lads…present…Fire!!…”
The Union regulars in town open fire on the Rebs moving up. Benefiting from their first fire Opening Volley (re roll misses) bonus they inflict several casualties on the Rebs. This triggers a morale check which they promptly failed…” back boys, take cover!!…”
The failed check causes the unit to Break. Hopefully they can recover at the end of turn.
.
.
.
.
 Looking to return the favour the rather overly aggressive cav are about to receive some good ‘ol boy buckshot shootin’…Firing with their rifled muskets at close range they pour in a devastating volley…devastating! They score 6 kills virtually wiping out the unit for the rest of the game…
…well, that’s what happens to mounted troops vs close range musketry I guess.
Amazingly they pass their morale test, their being no penalty for level of losses received …this raised an eye brow or two…as did the survivability of that cow…and their impetuousness of their charge!
.
.
.

Meanwhile the major holds his ground fortuitously finding himself right where he needs to be to rally the men running back his way.
.
.
.
.

On the left flank Rebs make good progress securing the objective in the woods moving as quick as possible to flank the Yankees at the same time.
Troops move half speed in woods for all formation but only skirmishers can move at the double in woods so they effectively move quicker in rough terrain.
.
.
.
.

…guerrillas move up as the lines of both sides close together…
In the Recovery phase the Reb major uses his ‘King and Country’ stratagem to automatically allow a broken unit to rally….those rebs ain’t runnin’ no where!
“…don’t let them see you runnin’ boys…form up!…”
.
.
.
Turn 3

The Rebs in the woods unleash their Opening Volley at the two remaining troopers hiding/defending/skulking behind those thick log fences. Those two red dots, ultimately, mark their resting place…R.I.P.
Flanking Rebs move at the double quick to get around the Yankee position whilst the main reb line moves up to form along the fenceline facing off the yanks in the town. At this point the rebel line is nicely secure and has control of two of the three objectives.
.
.
.
.

The firefight for the town.
Both sides fire their rifled muskets at long range (>12″) inflicting modest damage. The left hand (out of picture) reb unit is taking some punishment…
.
.
.
.

Marauders moving into position…you get a better view of the last of the Union cavalry before they were wiped out (red dots).
.
.
.
.

The Yankee marauders get into position and take some reb fire for the trouble…they hang tough, passing a morale check on a 5+ needed score.
.
.
.
.

Sensing the moment, the rebel officer sends his troops over the top and straight at the weakly held Yankee right flank. With support fire from a nearby unit the Rebs press on out of the wood and around the fence, confident their objective in the woods cannot be compromised by Yankee shenanigans…
.
.
.
.

“…their wavering boys, stick with it…”
.
.
.
.

“…pour it into ’em boys…”
The Rebs deliver some support fire into the guerrillas…
.
.
.
.

.
.
.
.

Trying their best to hold the line the Yankee marauders dish out a bit of their own hot lead….some accurate fire takes out a couple of Rebs as they advance forward…not enough to trigger a morale test…they keep comin’…
.
.
.
Turn 4

This turn sees the Yankees under some stress. They have one unit of guerrillas holding against an onslaught of three reb units whilst the firefight in the town is starting to slip from them, not without some success however. Their fire has seen off one unit of Rebs and now they are going toe to toe with the remaining unit.
Despite that, it looks like they won’t be able to secure two objectives so things look grim for their mission completion.
.
.
.
.

…we think the cow is both blind and deaf..it hasn’t moved 🙄
Determined to have at ’em, the rebs launch themselves at the marauders behind the fences.
.
.
.
.

…this picture shows the Rebs moving in to finish off the Yankee marauders…
.
.
.
.

…close up, it looks even worse! Those Yankees aren’t going to give up without a fight…”stick it to ’em boys…”
The combat is hard fought ie equal casualties…both sides stay in the fight until next turn…
Whilst this has been going on the Yankees start shuffling about in the town..what are they up to?
.
.
.
.
Turn 5

where’d those marauders go?..whose that guy on the hill?
.
.
.
.

The Rebs get fancy….
The Rebel player now decides that instead of fighting for a second turn against those damn Yankee guerrillas, that his infantry unit would break off instead.
He does this with a Disengage order, needing to pass a command check, which they do thanks to the presence of their mounted officer. The Yankees get a ‘free hack’, which amounts to nothing, much to the disgust of their commander. The rebs only fall back 2″ so don,t shift back to too much…
…however it is enough so the Rebs to their left rear can now fire “…let ’em have it!!…
With that, the marauders are finished off, barring one lucky hombre who heads for the hills…that’s who that guy was!
.
.
.
.

The Rebs are now near the last objective which would deliver them a decisive victory.
In a cunning move, the Yankee commander pulls his remaining two men in the town and forms up to put in a last ditch stand to defend the objective…can’t fault his courage…what’s going on?
.
.
.
.
Turn 6

You can see the rebs on the right have moved into town. The major is pressing forward waving his sword and the other reb units are poised to strike on at the last objective and finish the blue bellies off…
.
.
.
.

…”give ’em the cold steel…”
Full of confidence the rebs plunge into the assault.
.
.
.
.
…as it turns out the rebs kill two of the yankees but also lose two. In the post combat winner determination the charging unit is deemed to be the winner….
BUT
…the Yankee commander has taken the Indefatigable trait! this ability allows him (once per game) to convert any victory from defeat into victory!!!
So, with this twist of fate… one single Union officer forces the rebs to run…scared to death by the ferocity of the yankee officer before them 🙄
So with that the turn ends and the Union officer has held off the rebs to secure the objective….Medal of Honour to Major ‘who ever he is’…
The end of turn 6 requires a die roll to see if the game continues or ends. In this case it continues…that yankee officer ain’t gonna be saved by the bell!…
.
.
.
.

The rebs move back in for the kill.
“…surrender or die?…”
.
.
.
.
Turn 7

…he chooses the later and the Rebs deliver a volley of lead into the bravery Union officer. With that the game ends; all Yankees dead or runnin’ with only one lone marauder skedaddling off table to save himself…game over!
.
Debrief
So what did we think?
The game itself looked great and it was the first time our new 28mm ACW troops had hit the table – so 10 out of 10 there…it delivered a very nice look… I do like that Tinywargames Zulu War mat… it’s a lovely table surface to play on. Very practical and looks great.
As for game play, those Yankee cavalry got ahead of themselves such that had they dismounted on that fenceline and held up the rebel left flank with their breechloaders things may have panned out differently. The Rebs by being able to seize the two objectives early on certainly held an advantage; in the face of the breechloaders they most likely would’ve just hunkered down and made the Union player attack. With the breechloaders able to move and fire this was an option they could’ve pursued.
Unlike the Napoleonic period the higher rate of fire of the breechloaders and its move fire ability makes them an effective weapon in this period…as they were. Rifled muskets were treated as smoothbore muskets but with a slightly longer range (24″ vs 18″) and didn’t have a big impact on this game…though it could easily be a factor in others.
I allow the use of buck ‘n ball which gives the smoothbore muskets more lethality up close, so you get the nice paradigm of longer ranged rifled muskets vs potentially more deadly smoothbore muskets…if they can get into close range. The game can handle this easily and is a nice tactical problem for players to contend with.
The rules themselves are a little bit of a mixed bag. On balance, more good than not so, depending on your taste.
At their core they are relatively simple but there are lots of small, what you might call, fiddly rules that players need to get across. The action move system is quite good, the firing system is fairly clean and fast, and the combat system is classic warhammer and probably the least appealing element in the game. The combat system to me seems a little bit convoluted given the scale of play portrayed. There is a strong emphasis on leader order abilities and traits though these didn’t feature prominently in our game, though each leader’s stratagems did.
The simple initiative system I think is a little bit too simplistic. For me, a more dynamic initiative interaction between the players would’ve made from more interesting game play at the scale that the rules are aimed at. This should be a central element of play and it’s largely lost in the simple fixed initiative I-GO-U-GO system. The structured move sequencing just seemed a little bit out of place in what should be the cut and thrust of small unit actions where there is chaos all around.
The other thing that I think is appropriate for the horse & musket period is the sense of units breaking down through the amount of firepower and/or damaged they have received. In Chosen Men, it’s a straight figure loss system that doesn’t in any way really account for this element of play, though units can be ‘disordered’ by a break down of unit cohesion. That said, the ease of a single figure removal system is perfectly acceptable so this is largely a matter of personal choice and in no way is Chosen Men different to many other game systems in this regard.
Given the relative importance that the rules emphasise by the application of leaders, orders and stratagems, it seemed that these aspects of play were very much aimed at jazzing up the personalised aspects of leaders in the game. There is a veritable smorgasbord of attributes that leaders can choose from and in some respects I think there may be a little bit too many. It’s almost as if leaders plus their attributes are how the designer has attempted to create some sort of variation in the standard simple play sequence.
Although there is nothing particular wrong with that approach I think a more elegant internal call game engine could’ve produced more dynamic play without the pick and choose approach that has been adopted here. Nevertheless, that is in keeping with the kind of warhammer-esque elements that the game has derived from and does provide players with much pre game items to ‘choose from’.
I prefer a little less of this but this is largely personal choice. That’s not really a criticism but more just an observation. Some people like that type of approach instead of perhaps a more abstract and/or convoluted game mechanic that could equally be subject to scrutiny in a similar way…horses for courses.
The morale rules on the whole seemed fairly good. I think a further modifier to account for unit loss would be appropriate e.g. something like if a unit suffers losses under half strength then it suffers an additional -1 on its command check. This would allow for a slightly more historic reaction by troops that have suffered significant loss throughout the game or from one enemy action against them.
For example, you could either apply this modifier to the unit as a whole or as an additional modifier if more than half the unit is lost in one fire action. In our game, the Yankee player losing six out of eight cavalrymen and then to have the cavalry simply shrug it off relatively easily seemed just a little bit not quite right.
One point you may have noted was that the artillery that the Union player was supposed to have gotten as a preparatory bombardment never appeared. The game uses a slightly different and very warhammer style approach to artillery. It is actually quite a nice tangible game mechanic that the rules designer has used. However I think it’s a little bit too much game and not enough of a tilt to history that the approach has used, such that it limits artillery unnecessarily in the rules.
The basic artillery method is to use a number of dice to place a target marker and then another couple of dice to determine a ‘graze’ position and then assess casualties along the line of fire. Given the very low scale of play it seemed a little unusual that you have to roll to determine the initial target point which in the scale of play you should be able to simply place (target) anywhere on table.
I appreciate this is the ‘aimed shot’ of the first bounce of the ball but on a table this size in a skirmish game this spot should be able to be placed anywhere in line of sight of the firing gun. Instead you have to roll a limited number of dice to initially place the target marker which itself is added to a relatively small, so-called, ‘range’ of the weapon to determine this initial strike point. This has the unusual effect of restricting artillery range considerably.
In our game the preparatory Union bombardment could never take place because the average of these (4d6) dice never added up to enough distance for the artillery to reach across the table which it should easily have been able to do. This I think needs a little bit of attention as it just didn’t make any sense at all and in fact the Union player could never use his artillery in the opening stages of the game, which is exactly what the Cauldron of War attribute was supposed to deliver to him. Not a big deal, but I don’t think this one is quite right given the artillery range rules do not allow for fire to reach out in every situation which I think it otherwise should do if the target is visible.
Turning to the rulebook itself, within the covers the army lists provided are for forces of the Napoleonic Peninsular and Waterloo campaigns. Of course in our game we use lists for my American Civil War variant but as I’ve mentioned in the introduction these to a large degree were simply repurposed Napoleonic troop profiles. So there was nothing particularly specific to this period that was created through my ACW army lists that adversely effected the core design elements of the game i.e. the units were a mix of specific attributes placed on top of a standard Napoleonic troop profile.
I think the rules author and/or Osprey rules editors would’ve been much better served for the game to have been provided with the points method that the troop types were composed from so players could put together their own troop profiles. This IMHO restricts the utility of the game and I consider it a fairly big omission in the rules…other opinions may differ. There is certainly space within the rules to do this if one of the many Osprey pictures was simply removed.
Some in summation, it’s fair to say that the rules Chosen Men deliver a fairly good game and relatively fast paced. Our game was over in 2 1/2 hours of playtime which is a nice fit for a club evening. Personally, I would add a variable element to the initiative of each turn and possibly even adopt something along the lines of the unit activation chit pull method used in Sharp Practice/Bolt Action. I think this method provides a nice chaotic element within the game that should be a hallmark of this low-level skirmish type system.
Chosen Men delivers a fair bit in the small Osprey rulebook format…possibly the ‘densest’ rules produced in this series thus far and I think some people will like the relatively simple elements of it combined with the force trait and attribute component structure whilst others will find that the emphasis of this style of design is perhaps not to their liking.
Overall I’m in two minds about them and perhaps it’s a case of just what elements of play you think are important in a low level skirmish system. I suspect they will get another run at some point and certainly for a Napoleonic skirmish system they are one rule set that are worth considering.
Thanks for sticking with me this far if you made it and I hope that some of the above may be of some use if you’re considering picking up the rules. For the price point, I think on balance, they’re worth it.
.


A terrific idea and battle report. The links to your ACW modifications and QRS no longer work, however. Do you have updated links perhaps? Thanks much.
LikeLike
Thanks Will,
I’ll get those links sorted. I just checked them myself and they work fine…mmmm?
Not sure what’s going on there. 🙄
Cheers
LikeLiked by 1 person
I’ve given them new links – see if that works. let me know if possible. Cheers.
LikeLike
Yes indeed. Those links worked perfectly. Thank you.
LikeLike
Great Battle Report and ideas for using these rules for the ACW! I already have the rules, so just need to dust them off. Great work!
LikeLike
Thanks Ken,
Hope they are of some use. I think they certainly work within the framework of the rules as the AAR shows.
😉
LikeLiked by 1 person
Thank you for an enjoyable article. Most useful to me, as I have recently (with the wife) taken up Napoleonic (narrative style/skirmish) wargaming, and decided to give Chosen Men a decent try. Your review of the rules encourages me a lot.
Interestingly, it was a hard toss up between `getting into` Napoleonics or ACW: your article made it hard to resist the latter *grins* however… the wife is happy and very keen to get cracking with our own Richard Sharpe adventures :-))
LikeLike