

Bulldog’s Away!
This time we turn our attention to all things nautical – we take a look at a hypothetical clash in the contested Kuril Islands chain of islands currently in the hands of the Kremlin but a very sore point with the Japanese. It is circa early 2000s and with a new Russian president in power the Japanese Diet has decided it is time to take them back. They have dispatched a task force with a landing ship being assigned the mission to drop off a battalion of infantry to seize one of the islands…from there, they intend to see what the Russian’s next move will be.
However, the new Russian president, one Vladimir Putin, is not so easily pushed around and has tasked his littoral naval commander to stop the ‘invasion’ no matter what.

…with the scene set, the Japanese approach…
.
.
.
.

.
.
.
.

A Japanese P3 scouts out the landing zone
.
.
.
.
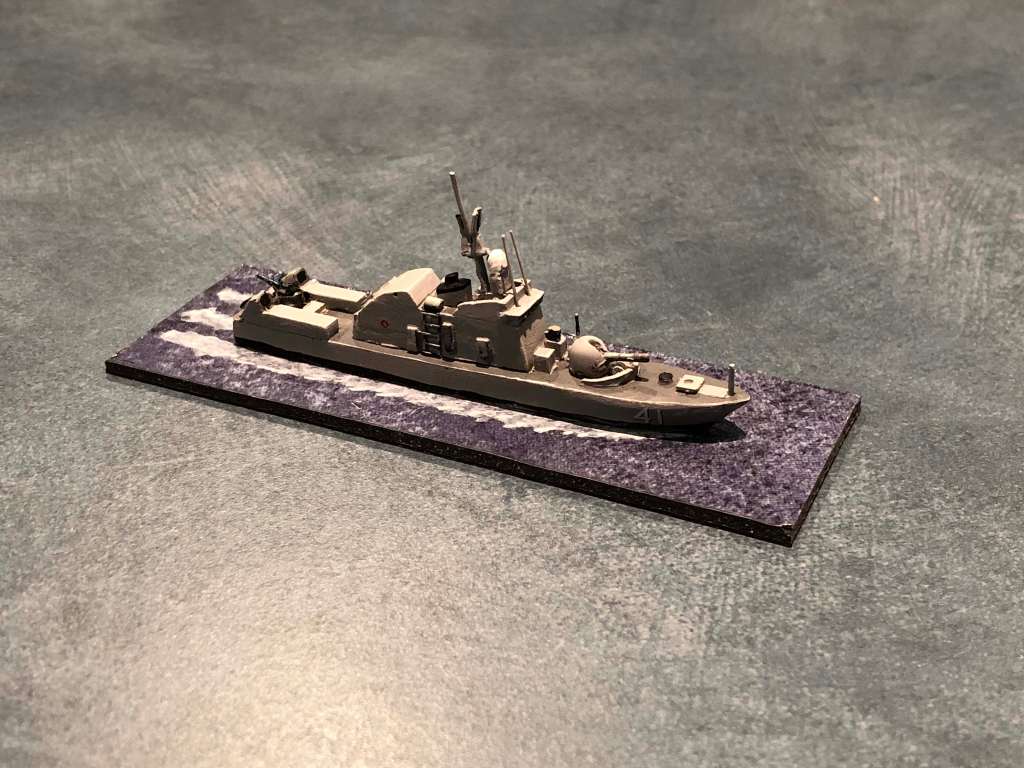
. Japanese Corvette.
.
.
.

A small Russian minesweeper in port just off the coast on a small island.
.
.
.
.

The Japanese landing ship tank Ōsumi with its on board helo sent airborne to scout out the landing zone. The Sea King carries four Hellfire missiles.
.
.
.
.

Near side table is the Russian deployment zone. Harbour bottom right with contact markers nestled into the islands. In the distance is the deployment zone for the Japanese fleet with some contact markers already placed.
Note – in Bulldogs Away contact markers are generated equal to the vessels present in your force as well as a number of randomly generated markers also. In this scenario the Russians rolled up 10 contact markers which was 4 more than the number of ships in their fleet enabling some degree of deception.
.
.
.
.

The deployment of contact markers is an important element in the game. The markers themselves are not representative of any specific vessel but just the potential for a vessel to be there. This significantly smooths out play when ships are placed on table as any ship can deployed off the blip markers as a player chooses.
It would not be unreasonable that in some scenarios certain types of vessels could be assigned to a specific markers. This perhaps could be the case where a very large vessel is part of the scenario.
.
.
.
.

.
.
.
.

.
.
.
.
To Battle!

The action starts with one of the Japanese corvette Shirataka moving at 20 kts (4 speed markers). The Japanese player deployed one of his ships on-table early so that he could conduct radar searches and start to look for the hidden Russian flotilla.
.
.
.
.

.
.
.
.

The second Japanese Corvette, Hayabusa, moves to the north (upper left of pic) to attempt to pass through the chain of sandbars and scout out the high concentration of Russian ‘blips’ in and around the islands.
Note – in Bulldogs Away blips are placed on table to indicate possible locations of vessels as mentioned above. Until these are radar identified they remain a potential deployment point for any vessel in the opposing fleet. At the point of radar identification, the player must choose whether the blip is real or removed as a dummy.
Dependent upon the rules of engagement, firing at a radar blip ‘contact’ is usually not allowed. Only when visual identification has occurred can that vessel be targeted. Naturally enough this usually happens at a closer range than the actual radar detection range which is longer.
.
.
.
.

.
.
.
.

… The Russians quickly bring their vessels up to speed and advance on the Japanese corvettes.
.
.
.
.

…Shirataka to the left, Hayabusa to the right…
.
.
.
.

.
.
.
.

…the Rassvet’s SS-N-2C Styx missiles are resolved first. The Shirataka takes evasive action with the ship’s captain ordering a full spread of chaff to be fired. Countermeasures decoy one of the Styx missiles however one gets through…
.
.
.
.

… The missile locks on and strikes the Shirataka amidships. The large warhead on the Russian missile does critical damage to the Japanese vessel making her a smoking wreck.
Note- the dieroll of 10 (0) plus the weapons damage modifier of +3 for the Styx warhead causes the result of wrecked vessel.
.
.
.
.

…one harpoon missile is deceived by the chaff, however one locks onto its target. In a blinding flash the crew of the Rassvet takes a critical hit from the harpoon, knocking out its fire control system and forward gun mount. In addition power is lost causing a ‘blackout’…
Note – because the harpoon missiles are active radar homing missiles (ARH) the loss of the launching vessel earlier in the phase does not affect their ability to acquire a target themselves with their self contained ‘seeker’.
.
.
.
.

.
.
.
.

.
.
.
.

… Meanwhile the Japanese Sea King still continued to prowl around deep inside the Russian port area. Flying at high-altitude it had a good view of the action that was unfolding below it.
.
.
.
.

.
.
.
.

… With no ability to spook the incoming harpoon the small Osa boat, whilst itself having a deadly sting, is largely defenceless when attacked by SSM. The harpoon missile locks on and hits the missile boat in the bridge. He smokes heavily, suffering heavy damage…
“…Crispy Ivan!…”
.
.
.
.

.
.
.
.

.
.
.
.

…the current tally shows the Japanese have lost one vessel and the Russians two – it would appear that the landing force was potentially in good shape. However there was still a number of Russian boats that had not yet emerged from their contact marker blips.
.
.
.
.

… The second Russian Corvette, Gromkiy, emerges from behind a large island. In addition another Osa boat comes up to speed in an effort to quickly close the gap with the Japanese vessels.
.
.
.
.

Note – using the island for cover the small but deadly missile boat emerges within a matter of miles of the Kumataka, screened by the island from radar and visual identification.
.
.
.
.

.
.
.
.

.
.
.
.

With all three Japanese corvettes now on table, the Russians unleash a flurry of missiles towards the Kumataka. Tension rises significantly on the bridge of the Kumataka as eight Styx surface to surface missiles head their way…
…whilst on one of the Osa boats a plume of smoke of the stern indicates that they too are under attack…it’s a hellfire missile launched by the Japanese Sea King…
.
.
.
.

.
.
.
.

.
.
.
.

.
.
.
.

…with an almighty explosion the single remaining styx missile (of four) hits the magazine of the Kumataka and it is completely wrecked in a fiery explosion. The four remaining styx missiles also slam into the hulk which is now a floating wreck.
.
.
.
.

…however, before she met her fate the Kumataka got a way two harpoons of its own. The harpoons skim the sea-surface towards the Osa to their front whilst on the boat’s stern a hellfire missile from the helicopter closes in…a very tight spot!
.
.
.
.

…with gritted teeth the Osa boat crew nervously await the approach of the SSM rapidly moving towards them. One missile pass overhead, going ballistic and splashing into the sea.
The remaining missiles climbed then dipped in its death-dive to hit its target…however a last minute correction by the onboard sensors had it exploding to the side off the ship causing minimal damage (the roll of 1).
Much to the amazement (and amusement) of both players two harpoons failed completely to take out the defenceless Osa sitting in open water.
.
.
.
.

…the Osa boat had one more ordeal to endure however. The hellfire missile fired from the helicopter did find its mark. The small warhead however did little damage against the boat. The vessel suffered only light damage with no special damage…basically getting away unscathed….one lucky crew indeed surviving a hit from a harpoon and hellfire missile!!
.
.
.
.

… In a flash, the Hayabusa was set ablaze with heavy damage. This now resulted in the three escorting Japanese ships being combat ineffective.
.
.
.
.

.
.
.
.

So ended the foray by the Japanese Navy to wrest control of the Kuril Islands back for now…they shall have to plan a different approach next time!
.
.
.
.
Postscript
Thus ended our clash using Bulldogs Away. A most enjoyable and realistic encounter of littoral combat in our estimation.
The game really does produce some tense action with choices about were to deploy ships when radar detected and then those same ships being not yet viable targets until visually identified. Vessels struck by missiles as you’d expect suffer heavily and particularly if they are such small vessels. Interestingly in our game the helicopter fired off 3 of 4 hellfire missiles which did very little damage due to its light warhead.
That same helicopter however was quite useful in flying forward to locate and detect radar blips lying in wait aka enemy vessels (or not). I think adding air assets would make the game feel quite different and really bring in another tactical layer and some interesting scenario play.
One point we thought we might house rule is that when a ship fires a weapon then it makes itself visible to enemy forces and eligible as a target itself in subsequent turns subject to normal ranges of visibility and radar detection.
All in all, an excellent run out of ‘Bulldogs’ and the game was all over in 3 hours thereabouts…an enjoyable afternoon.

.
.
.
.

